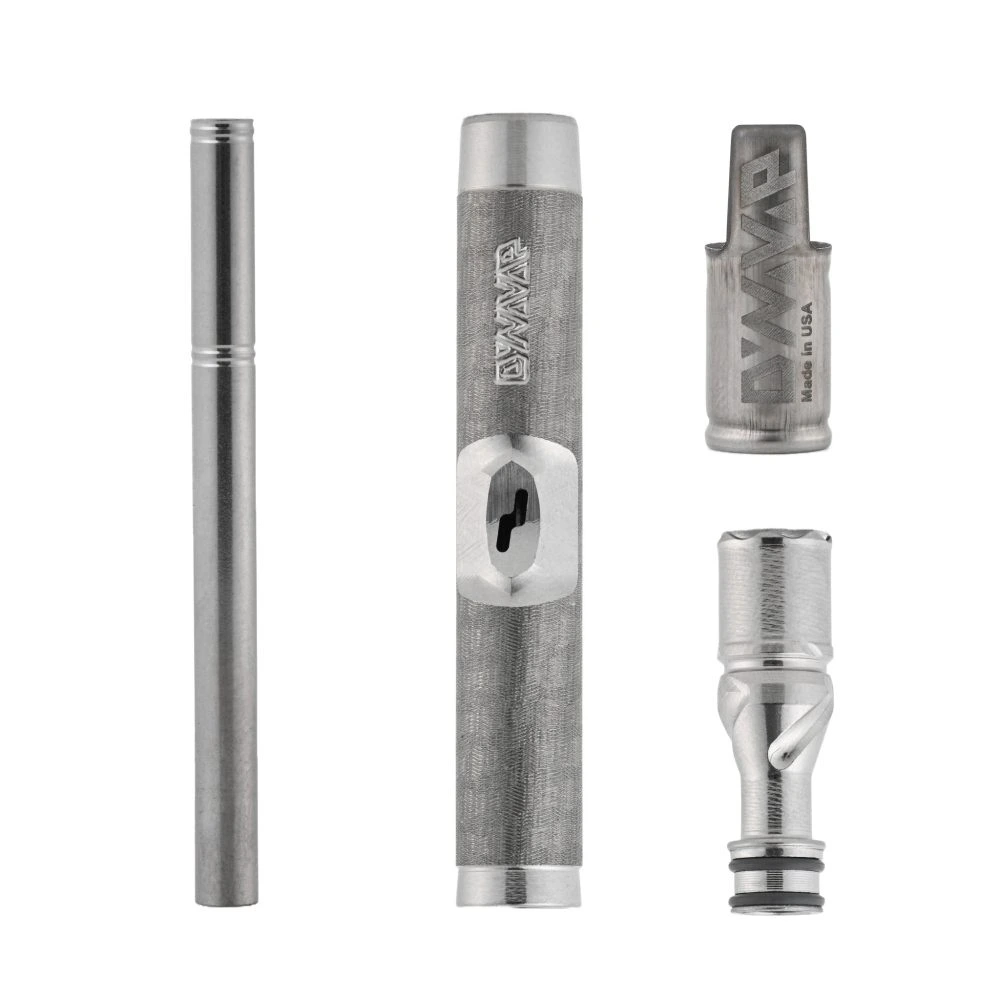
How to Use a DynaVap: Heating, the Click & Airflow
You’ve got your DynaVap in your hand, a lighter next to it, and somehow the first attempt doesn’t give you much. Or you combust your herb. Or the click never comes. Happens to a lot of people at the start. The good news: the DynaVap isn’t a complicated device — it just needs a technique you understand once, and then everything clicks into place (pun intended).
This guide walks you through what physically happens when you heat, where to hold the flame, how to control airflow and packing, and which mistakes most beginners (and some experienced users) keep making.
How to use a DynaVap — the short version
- Heat the cap, not the stem: torch about a finger-width (1–2 cm) away, keep the device rotating, stop at the first click.
- Where you heat sets the character: toward the tip = cooler and flavour-forward, toward the base = hotter, denser clouds (and a faster-toasted bowl). Start in the middle.
- Respect the click: draw right after the first click; the second (cooling) click means the cap is ready for another cycle.
- Airflow: carb hole open = cooler, lighter draw; covered = warmer, denser vapour.
- Tastes burnt? Flame too close, no rotation, heating past the click or a spent bowl — see the 60-second fix.
What happens at the click — and why it matters

The DynaVap has a stainless-steel thermal indicator cap. A temperature-responsive indicator inside reacts as the cap heats and produces the audible click. The click is therefore an operating signal from the cap, not a calibrated thermometer.
The click tells you: the cap has reached its intended operating range. There is no universal click temperature; the cap, tip, heat source, distance and heating position all affect the cycle. DynaVap’s official instructions therefore say to remove the heat immediately at the click and then draw.
The second click — the cooling click — comes when the cap cools back down and the spring snaps back. That’s your signal: if you want another hit, you’re ready to heat again. Or you’re done.
Respect the Click isn’t just a community slogan. It’s literally the instruction manual for the device.
Where you heat — tip, middle, base of the cap
This is where most beginners go wrong. The position of your flame determines what happens inside the chamber.
Tip of the cap (closed end): The click mechanism responds sooner here, before the herb chamber underneath has absorbed as much heat. The result is a cooler, brighter, flavour-forward start with lighter vapour. Ideal for the first one or two hits of a fresh bowl.
Middle of the cap: The standard zone for most users. Even heat distribution, reasonably fast click, solid balance between flavor and vapor volume. If you’re new, start here.
Base of the cap (near the body): The heat has to travel through the loaded chamber before the disc clicks, so the material gets noticeably hotter. You get thicker, denser clouds — but the bowl toasts faster, and on back-to-back cycles this is the zone where a burnt taste starts. Use it deliberately for the last hits of a bowl, not for the first.
A general rule: the closer to the tip you heat, the cooler and more aromatic the hit. The closer to the base, the hotter and denser — and the less forgiving.
Single flame vs. multiple flames
Which lighter you use changes the experience significantly.
Single jet: The classic choice. You have plenty of control and can aim precisely at specific areas of the cap. Heating is usually slower than with multiple flames; time to click varies substantially with the cap, tip, distance and flame size. Use the click, not a stopwatch, as the endpoint.
Triple jet: Faster, hotter and less precise. Useful when you want a quick heat-up or are outside in the wind. The downside: it is easier to miss the click or create a hot spot when the flame is too close.
Induction heater: No lighter, electric coil. Repeatable results, no butane smell, very fast. The most convenient option for home use. Technically no longer a butane vaporizer, but the DynaVap is built for it.
For starting out: single jet, about a finger-width (1–2 cm) away, rotate slowly. Rotating matters — more on that in a moment.
Airflow control: the carb hole trick
On the DynaVap body — more or less prominent depending on the model — you’ll find a small hole called the airport or carb hole. That’s your airflow control.
Carb hole open: More air comes in, the draw becomes lighter, the chamber cools a bit faster through air mixing. The vapor is less concentrated but cooler and smoother.
Carb hole closed (thumb over it): More pressure, the vapor from the chamber comes straight through the body to you. More intense, warmer, denser. For short strong hits.
Many users play with it mid-draw: hold it shut for the first part, then open it to cool. It sounds more complicated than it is — after a few sessions you’ll do it automatically.
Packing technique: loose, tight, half-filled
How you pack affects airflow, evenness, and how much you need per session.
Loosely packed: Good for airflow, the herb heats evenly throughout. Easy draw. Downside: smaller amount, particles can shift. Works well for flavor sessions.
Tightly packed: More herb, more intense sessions. But airflow suffers and even heating becomes harder. If you pack too tight, you get uneven extraction — scorched at the top, barely touched at the bottom.
Half-bowl: For many users this is the sweet spot. You only fill half the chamber and leave the rest empty — or layer it: finer grind at the bottom, coarser at the top. Less herb per session, less consumption overall, but more complete extraction. The screen keeps everything in place.
Generally: medium grind. Too fine and material wanders into the body. Too coarse and extraction is incomplete.
Temperature surfing — flavor vs. clouds
Fine-tuning a DynaVap does not mean adding heat after the click. Control the result with heating position, flame size, distance, rotation speed, airflow and the next regular heat cycle; the click remains the endpoint of every heat-up.
Flavour-forward start: Aim nearer the closed end of the cap, heat evenly and remove the flame at the click. The chamber has absorbed less heat by the time it signals.
Balanced draw: Heat the middle of the cap, rotate continuously and draw immediately after the click.
Denser vapour: Aim a little farther toward the base, keep the load loose and adjust the airport during the draw — but still end the heat-up at the click. Wait for the cooling click before starting another cycle.
Using a bong or water filter
With the right adapter, the DynaVap fits into many bongs and bubblers. This changes the experience quite a bit.
Water cools and filters the vapor. That allows for bigger hits without harshness. You can also ease the draw — water provides softer resistance than pulling direct.
Things to keep in mind: Using a water pipe means losing some airflow control through the carb hole. Also, more condenses on the walls. If you use a bubbler, don’t overfill it with water — you’ll get splashback.
For the DynaVap M and newer models there are official adapters. Third-party 10mm adapters also work well as long as the fit is right.
DynaVap tastes burnt? The 60-second fix
A burnt, popcorn-like taste on the very first draw is the most common DynaVap complaint — and it is almost always technique, not the device. The cap reached click temperature, but the material underneath was pushed past it: the flame sat too close, in one spot, or a moment too long.
Usual causes, in order of likelihood:
- Flame too close — the cap gets blasted instead of warmed. Keep the torch about a finger-width (1–2 cm) away.
- Heating low on the cap (near the body) from the first cycle on — that is the hottest zone, see above.
- No or paused rotation — one side of the cap runs far hotter than the other.
- Chasing the click — a “bonus second” after the click is combustion territory.
- Back-to-back cycles without the cooling click — the next heat starts on a chamber that is still hot.
- Spent or dirty bowl — dark brown material or residue in the tip tastes burnt no matter how well you heat.
The reset routine: fresh load, medium grind, don’t pack it tight. Hold the flame a finger-width off the cap, aim at the upper third (toward the tip) for the first cycle, rotate continuously, stop exactly at the click and draw. Wait for the cooling click before you heat again. If the second cycle is still harsh, dump the bowl — it was already spent — and give cap and tip a quick isopropyl wipe.
The most common mistakes
1. Overheating: Flame too close, too long, no rotation. The cap glows, it smells burnt, the first hit is harsh. Fix: more distance, heat slower, don’t forget to rotate.
2. Wrong angle: Holding the DynaVap upright like a joint? The herb falls into the body. Better to hold it horizontal or slightly tilted down so the herb stays in the chamber.
3. Ignoring the cooling click: You hear the first click, draw, but don’t pay attention to the second one. Then you heat again while the chamber is still hot — leading to overheating on the next round. Wait for the second click and you’ll know you’re ready.
4. Packed too tight: No airflow, uneven extraction, difficult draw. Fill it lightly, don’t stuff it.
5. No rotation while heating: Holding the flame still only heats one side of the cap. Rotate the device evenly between your fingers while you heat. That gives you even temperature distribution across the whole cap.
Advanced tips
Second cycle without reloading: After the first draw, wait for the cooling click and then heat the same load again. Residual warmth can shorten the next cycle, so keep rotating and stop exactly at the click again. Do not reheat a cap that is still hot.
Flavour-focused cycle: Use a single jet from a little farther away, aim toward the closed end and heat steadily and evenly. This lengthens the heat-up and prioritises flavour; it still ends at the click rather than after a fixed number of seconds.
Spinning technique: Instead of rotating the device between your fingers, hold it still and move the flame in a circle around the cap. Same principle, different motor pattern. Some people find it more stable.
Vaporizer digging: Between hits you can loosen the herb in the chamber with a small tool (some models include a built-in scoop). This improves airflow and leads to more even extraction on the second heat.
Wrap-up
The DynaVap isn’t a device you just switch on and draw from. It’s a tool that responds to your technique. Heat slowly, rotate, and pay attention to the click — and you’ll get results that many electric devices can’t match, all with a lighter and stainless steel.
The learning curve is real but short. Usually three to five sessions is all it takes before the right movements start happening naturally. After that you’ll wonder why you ever used anything else.
If you don’t have a DynaVap yet or want to compare different models: all DynaVap models with current prices
Current Prices
Frequently Asked Questions
How do you use a DynaVap for the first time?
Grind medium, fill the tip loosely (half a bowl is fine), hold the device slightly tilted down, heat the cap with a single-jet torch from about a finger-width away while rotating it, stop at the first click and draw slowly. Wait for the second (cooling) click before the next cycle. Three to five sessions are usually enough to make it automatic.
Where should you heat the DynaVap cap?
Toward the tip end for a cooler, flavour-forward start; the middle for a balanced hit; toward the base for denser clouds — at the cost of toasting the bowl faster. Keep the flame about 1–2 cm away and rotate the DynaVap evenly between your fingers.
What does the DynaVap click mean and when should you draw?
The click is the cap’s operating signal, not a calibrated thermometer with one universal temperature. Remove the heat immediately at the click and draw — do not keep heating. The second click while cooling means the cap is ready for the next cycle.
Why does my DynaVap taste burnt?
Usually because the flame was too close, sat in one spot or stayed on past the click — or because the bowl is already spent. Raise the torch to a finger-width, rotate continuously, stop at the click, wait for the cooling click before reheating and reload dark material. Residue on cap and tip also tastes burnt; a quick isopropyl wipe fixes that.
How far away should the flame be?
About 1–2 cm — a finger-width — for a single-jet torch, a little further for a triple jet. Closer speeds up the click but concentrates the heat on one spot; further away is slower but more even and forgiving.
Why doesn’t my DynaVap click?
Stop heating instead of continuing blindly. Let the cap cool completely, then check the butane level, wind, fit and visible damage. Test once more carefully using the official heating sequence. If it still does not click, stop using the cap and replace it or contact DynaVap support.
How do you get thicker clouds from a DynaVap?
Heat a little farther toward the base of the cap, rotate evenly, keep the load loose, partly cover the airport during the draw and inhale slowly. Even for denser vapour, remove the heat immediately at the click; after the cooling click you can start another regular cycle.
How much does a DynaVap currently cost?
The DynaVap M7 currently starts at 59.29 € incl. shipping; the entry-level B, B2 and G3 are cheaper still. All prices are updated daily across hundreds of shops.